-
Nginx 프록시 구축 ( AWS ,Cerbot)Infra & Tools 2022. 12. 7. 01:46
하나의 ec2 가상 컴퓨터에 dev server, release server , web server 를 구현 하는 법이다.
필수 숙지 Nginx 관련 커맨드
# Nginx 시작 및 systemctl에 등록
sudo systemctl start nginx
#Nginx 중지
sudo systemctl stop nginx
# Nginx 재시작
sudo systemctl restart nginx
# Nginx 다시 로드
sudo systemctl reload nginx
부팅 시 자동으로 시작되는 것을 비활성화할 수 있으며 비활성화된 것을 다시 활성화할 수 있습니다.
# 부팅 시 Nginx 자동 시작 해제
sudo systemctl disable nginx
# 자동 재시작으로 다시 활성화 경우
sudo systemctl enable nginx
Nginx 서비스의 현제 상태 확인
sudo systemctl status nginxlisten 중인 포트 확인!
 netstat -tnl

//또는 쉘에서 다음과 같이 치면 현재 열린 포트 목록을 확인할 수 있다.

lsof -PiTCP -sTCP:LISTEN

//특정 포트를 찾아 포트를 닫고 싶으면 다음과 같이 쳐서 PID를 알아낸다.

sudo lsof -i :3000

//위에서 나온 PID(23)를 다음 명령어에 넣으면 포트가 닫힌다.

sudo kill -23 PID
바로 실습 : AWS EC2 우분투 환경 ,
--------------------------------------------------------------------------------------------------------------------------------------------------------------------------------------------------------------------------------------------
0. 돌아가고 있는 서버들
pm2 list
┌─────┬─────────────────┬
│ id  │ name            │
├─────┼─────────────────┼
│ 12  │ CMS             │
│ 8   │ Nyam-Backend    │
│ 9   │ Nyam-Dev        │
└─────┴─────────────────┴
CMS : 웹 페이지 , 웹 서버
Nyam-Backend : release 서버 : 서비스 중인 서버 -> 릴리스 디비에 연결이 되어있다.
Nyam-Dev : Dev 용 서버 : 개발에 이용하는 서버 -> 개발용 디비에 연결이 되어 있다.
1. 열러 있는 포트 : AWS 의 인바운드 규칙을 편집 해주자 ! (지금 설정은 보안에 취약 하다.)
$netstat -tnl
Active Internet connections (only servers)
Proto Recv-Q Send-Q Local Address           Foreign Address         State
tcp        0      0 0.0.0.0:80              0.0.0.0:*               LISTEN
tcp        0      0 0.0.0.0:81              0.0.0.0:*               LISTEN
tcp        0      0 0.0.0.0:22              0.0.0.0:*               LISTEN
tcp        0      0 127.0.0.53:53           0.0.0.0:*               LISTEN
tcp        0      0 0.0.0.0:443             0.0.0.0:*               LISTEN
tcp        0      0 127.0.0.1:27017         0.0.0.0:*               LISTEN
tcp        0      0 0.0.0.0:3003            0.0.0.0:*               LISTEN
tcp        0      0 0.0.0.0:3000            0.0.0.0:*               LISTEN
tcp        0      0 0.0.0.0:3001            0.0.0.0:*               LISTEN
tcp6       0      0 :::80                   :::*                    LISTEN
tcp6       0      0 :::22                   :::*                    LISTEN
tcp6       0      0 :::443                  :::*                    LISTEN
벡엔드 서버 두개 올리기
1. 80 포트는 3000번 (릴리스 벡엔드 서버)로 넘긴다. : url : https://api.example.com/api/v1/~/~
2. 81 포트는 3003번 (개발용 벡엔드 서버)으로 넘긴다. : url : http://api.example.com:81/api/v1/~/~
nest.JS 웹페이지도 올리기
3. 80 포트를 이용하며 3001번 (릴리스 웹 서버로)로 처리한다 . url : https://cms.example.com/api/v1/~/~
: 서로 다른 url 을 하나의 서버 로 보내는 것으로도 구성이 가능하다.
Tip! ) 앱에서 이미지 파일을 올리기 위해서는 max File size 를 늘려 주어야합니다.
client_max_body_size 50M; : file size 를 max 50 mb 까지 받습니다.
site-enbale 프록시 구성 ,
방식 : cerbot classic 적용 후 수정 ,
도메인 : example.com
서브 도메인 : api , api1, cms
file : ~/sites-enable/ vi default
erver {

    if ($host = api1.example.com) {
        return 301 https://$host$request_uri;
    } # managed by Certbot

	if ($host = api2.example.com) {
        return 301 https://$host$request_uri;
    }

    if ($host = example.com) {
        return 301 https://$host$request_uri;
    }

    if ($host = cms.example.com) {
        return 301 https://$host$request_uri;
    }

        listen 80 ;
        listen [::]:80 ;
    server_name api1.example.com example.com cms.example.com api2.example.com;

    return 404;

}

#for Dev
server{

        listen 81;
        server_name api.example.com;
        location / {
                proxy_pass http://127.0.0.1:3003;

                proxy_buffer_size          128k;
                proxy_buffers              4 256k;
                proxy_busy_buffers_size    256k;
                proxy_connect_timeout 300;
                proxy_send_timeout 300;
                proxy_read_timeout 300;
        }
}


#for Release
server {

        # SSL configuration
        #
        # listen 443 ssl

        server_name  api1.example.com cms.example.com api2.example.com;

        set $port 3000;


        if ($host = cms.example.com) {
                        set $port 3001;
        }

        if ($host = api1.example.com) {
                set $port 3000;
        }

        if ($host = api2.example.com) {
                set $port 3002;
        }


      location / {
                proxy_set_header Host $http_host;
                proxy_set_header X-Forwarded-For $proxy_add_x_forwarded_for;
                proxy_set_header X-Forwarded-Proto $scheme;
                proxy_set_header Upgrade $http_upgrade;
                proxy_set_header Connection "upgrade";
                proxy_set_header X-Real-IP $remote_addr;
                proxy_pass http://127.0.0.1:$port;

                proxy_connect_timeout 300;
                proxy_send_timeout 300;
                proxy_read_timeout 300;

                proxy_redirect off;
                proxy_buffer_size          128k;
                proxy_buffers              4 256k;
                proxy_busy_buffers_size    256k;
                }

             listen [::]:443 ssl ipv6only=on; # managed by Certbot
    listen 443 ssl; # managed by Certbot
    ssl_certificate /etc/letsencrypt/live/api1.example.com/fullchain.pem; # managed by Certbot
    ssl_certificate_key /etc/letsencrypt/live/api1.example.com/privkey.pem; # managed by Certbot
    include /etc/letsencrypt/options-ssl-nginx.conf; # managed by Certbot
    ssl_dhparam /etc/letsencrypt/ssl-dhparams.pem; # managed by Certbot


}
/etc/nginx/ nginx.conf
user www-data;
worker_processes auto;
pid /run/nginx.pid;
include /etc/nginx/modules-enabled/*.conf;

events {
        worker_connections 768;
        # multi_accept on;
}

http {
        client_max_body_size 50M;
        ##
        # Basic Settings
        ##

#       sendfile on;
#       tcp_nopush on;
#       types_hash_max_size 2048;
        # server_tokens off;

        # server_names_hash_bucket_size 64;
        # server_name_in_redirect off;

        include /etc/nginx/mime.types;
#       default_type application/octet-stream;

        ##
        # SSL Settings
        ##

#       ssl_protocols TLSv1 TLSv1.1 TLSv1.2 TLSv1.3; # Dropping SSLv3, ref: POODLE
#       ssl_prefer_server_ciphers on;

        ##
        # Logging Settings
        ##

        access_log /var/log/nginx/access.log;
        error_log /var/log/nginx/error.log;

        ##
        # Gzip Settings
        ##

        #gzip on;

        # gzip_vary on;

      # gzip_types text/plain text/css application/json application/javascript text/xml application/xml application/xml+rss text/javascript;

        ##
        # Virtual Host Configs
        ##

        include /etc/nginx/conf.d/*.conf;
        include /etc/nginx/sites-enabled/*;
}


#mail {
#       # See sample authentication script at:
#       # http://wiki.nginx.org/ImapAuthenticateWithApachePhpScript
#
#       # auth_http localhost/auth.php;
#       # pop3_capabilities "TOP" "USER";
#       # imap_capabilities "IMAP4rev1" "UIDPLUS";
#
#       server {
#               listen     localhost:110;
#               protocol   pop3;
#               proxy      on;
#       }
#
#       server {
#               listen     localhost:143;
#               protocol   imap;
#               proxy      on;
#       }
#}
--------------------------------------------------------------------------------------------------------------------------------------------------------------------------------------------------------------------------------------------
--------------------------------------------------------------------------------------------------------------------------------------------------------------------------------------------------------------------------------------------
1. 설치 방법 : mac 기준 Local 환경에서 설치 하는 케이스
- brew install nginx
2 . 확인 방법
찾기
- 현 위치
find / -name nginx.conf- /usr/local/etc/nginx/nginx.conf

3 . 실행 및 확인
brew로 설치한 패키지는 brew services start nginx 로 실행

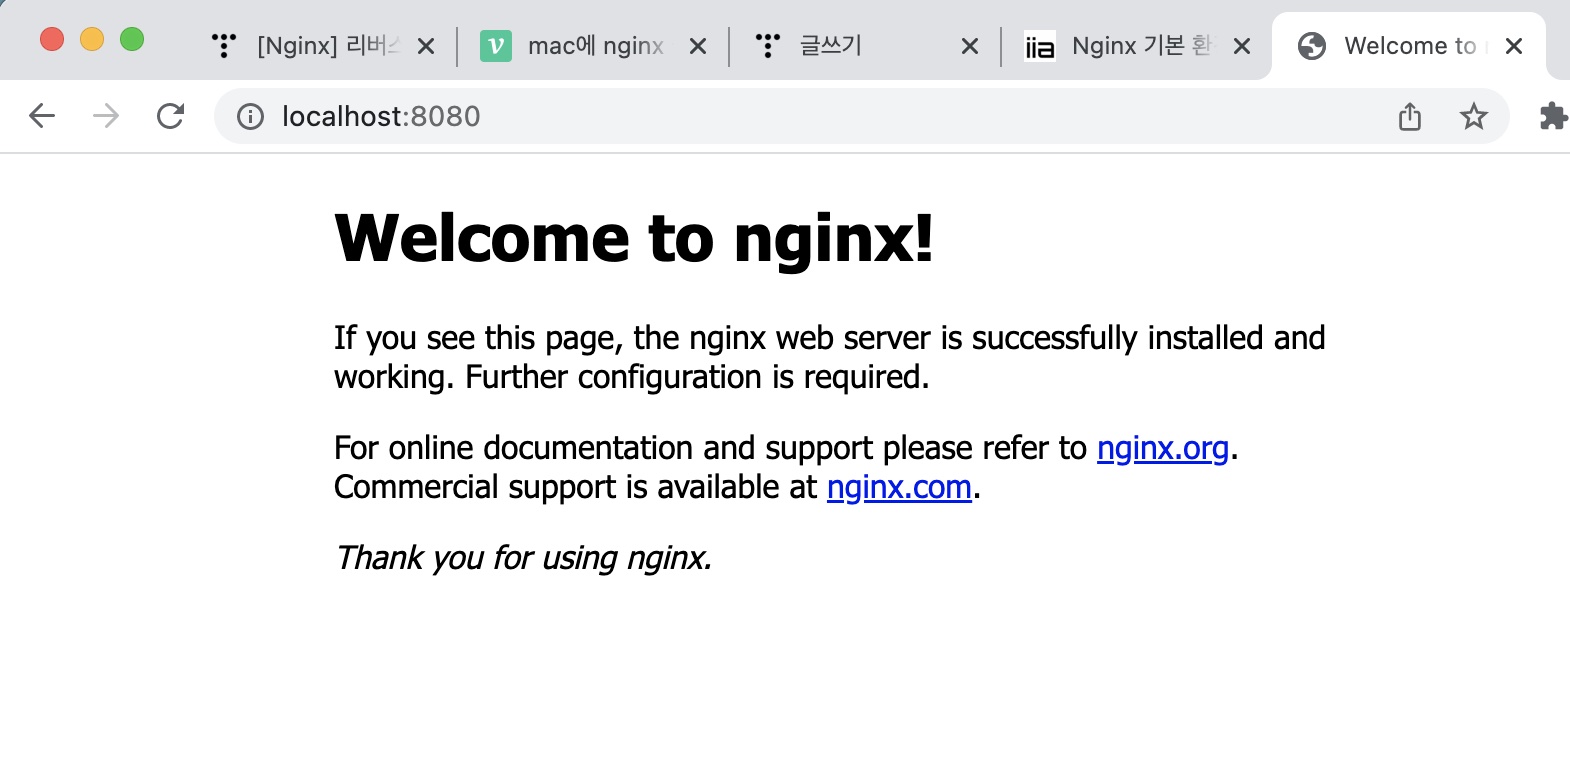
http://localhost:8080 으로 실행 된다.
- 확인했으면 종료 한다.
$ brew services stop nginx
3. 리버스 프록시설정. 간단 하게 포트만
대부분의 서비스 파일 설정이 configure 파일에 있는것과 같이 nginx 도 conf 파일에 세부 설정이 있다 .
$vi /usr/local/etc/nginx/nginx.conf
$vim /usr/local/etc/nginx/nginx.conf
vi , vim nano 중 원하는 에디터로 열어 본다.
worker_processes  1;

#error_log  logs/error.log;
#error_log  logs/error.log  notice;
#error_log  logs/error.log  info;

#pid        logs/nginx.pid;


events {
    worker_connections  1024;
}


http {
    include       mime.types;
    default_type  application/octet-stream;

    #log_format  main  '$remote_addr - $remote_user [$time_local] "$request" '
    #                  '$status $body_bytes_sent "$http_referer" '
    #                  '"$http_user_agent" "$http_x_forwarded_for"';

    #access_log  logs/access.log  main;

    sendfile        on;
    #tcp_nopush     on;

    #keepalive_timeout  0;
    keepalive_timeout  65;

    #gzip  on;

    server {
        listen       8080;
        server_name  localhost;

        #charset koi8-r;

        #access_log  logs/host.access.log  main;

        location / {
            root   html;
            index  index.html index.htm;
        }

        #error_page  404              /404.html;

        # redirect server error pages to the static page /50x.html
        #
        error_page   500 502 503 504  /50x.html;
        location = /50x.html {
            root   html;
        }

        # proxy the PHP scripts to Apache listening on 127.0.0.1:80
        #
        #location ~ \.php$ {
        #    proxy_pass   http://127.0.0.1;
        #}

        # pass the PHP scripts to FastCGI server listening on 127.0.0.1:9000
        #
        #location ~ \.php$ {
        #    root           html;
        #    fastcgi_pass   127.0.0.1:9000;
        #    fastcgi_index  index.php;
        #    fastcgi_param  SCRIPT_FILENAME  /scripts$fastcgi_script_name;
        #    include        fastcgi_params;
        #}

        # deny access to .htaccess files, if Apache's document root
        # concurs with nginx's one
        #
        #location ~ /\.ht {
        #    deny  all;
        #}
    }


    # another virtual host using mix of IP-, name-, and port-based configuration
    #
    #server {
    #    listen       8000;
    #    listen       somename:8080;
    #    server_name  somename  alias  another.alias;

    #    location / {
    #        root   html;
    #        index  index.html index.htm;
    #    }
    #}


    # HTTPS server
    #
    #server {
    #    listen       443 ssl;
    #    server_name  localhost;

    #    ssl_certificate      cert.pem;
    #    ssl_certificate_key  cert.key;

    #    ssl_session_cache    shared:SSL:1m;
    #    ssl_session_timeout  5m;

    #    ssl_ciphers  HIGH:!aNULL:!MD5;
    #    ssl_prefer_server_ciphers  on;

    #    location / {
    #        root   html;
    #        index  index.html index.htm;
    #    }
    #}
    include servers/*;
}
$ sudo nginx
확인
http://localhost:81/
http://localhost:8080/

둘다 잘날라간다 굿 Postman 으로도 확인이 가능하다.
http://localhost:8080/api/v1/auth/adminInfo
=
http://localhost:3001/api/v1/auth/adminInfo
참고
https://computer-science-student.tistory.com/393
Nginx 명령어 - 실행, 재실행, 중단, 상태보기
Nginx 명령어 Nginx 실행 service nginx start sudo service nginx start sudo systemctl start nginx Nginx 재실행 service nginx restart sudo service nginx restart sudo systemctl restart nginx Nginx 중단..
computer-science-student.tistory.com